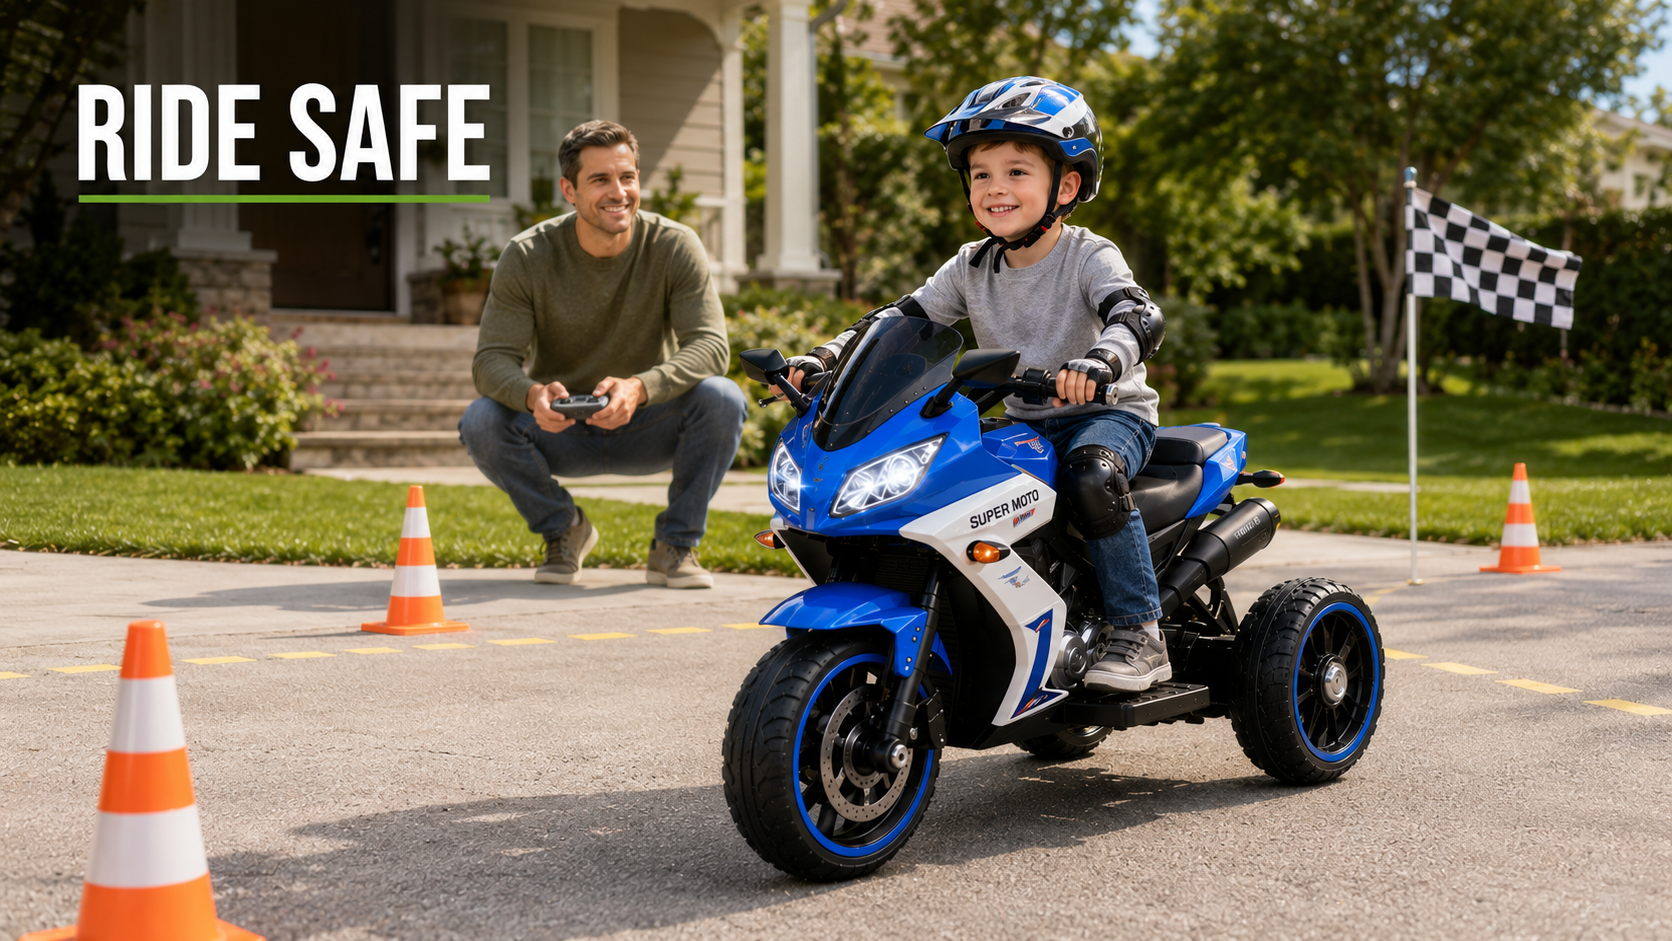
A child’s first electric motorcycle almost always arrives with the same mix of emotions: the kid is thrilled, and the parent is quietly wondering whether they’ve just handed over something they’ll regret. That instinct is healthy. It’s also, for a low-speed electric ride-on, usually more cautious than it needs to be – as long as a few sensible basics are in place.
The confusion is understandable. Search “kids motorcycle safety gear” and you’ll find pages recommending DOT-certified full-face helmets, armored jackets, and over-the-ankle boots. That advice is real and correct – but it’s written for gas-powered mini-bikes and dirt bikes that reach highway-adjacent speeds, not for a battery-powered ride-on toy that tops out around walking-to-jogging pace. Applying dirt-bike gear standards to a 3 mph driveway toy isn’t safer; it’s just overwhelming.
This guide gives you the right-sized answer: what your child genuinely needs to wear, what’s optional, what’s overkill, and how to set up a riding space and a set of house rules that make the whole thing low-stress. If you’re still choosing a model, ourcomplete buyer’s guide for kids’ ride-on motorcycles covers voltage, stability, and features – but this article assumes you’re focused on riding safely once the bike is home.
First, Understand What Kind of “Motorcycle” You’re Dealing With
An electric ride-on motorcycle for kids is a low-speed outdoor toy, typically running between roughly 2 and 5 mph depending on the model and speed setting. Quality models are built for stability rather than performance: a wide, three-wheel stance that resists tipping, a soft-start motor that ramps up gradually instead of lurching, and – on better models – a parental remote that lets an adult cap the speed or stop the bike entirely.
That design context changes the safety conversation completely. The realistic risks with a low-speed ride-on aren’t high-speed crashes. They’re the ordinary ones: a tip or tumble at low speed, a scraped knee on pavement, a collision with a fixed object or a sibling, or rolling somewhere it shouldn’t – toward a step, a slope, a pool, or a driveway edge. Good safety habits are aimed squarely at those risks, and they’re simple to put in place.
What Your Child Should Wear: The Right-Sized Gear List
Here’s the practical breakdown for a low-speed electric ride-on motorcycle, sorted by how essential each item actually is.
Gear
How essential
Why
Helmet (CPSC-certified bike/multi-sport)
Essential
Head protection is the one non-negotiable; a bike-style helmet is the correct type for this speed range
Closed-toe shoes (sneakers)
Essential
Prevents scraped or caught toes during slow stops and foot-down moments
Long pants / leggings
Recommended
Protects knees and shins from pavement scrapes at little comfort cost
Knee & elbow pads
Recommended for beginners & hard surfaces
Most useful in the wobbly learning phase and on concrete
Gloves (light)
Optional
Nice for comfort and minor hand scrapes; not critical at these speeds
Designed for gas bikes and high speeds; unnecessary and uncomfortable here
The helmet is the one rule you don’t bend
If you take only one thing from this guide: a helmet, every ride, no exceptions. It’s the single piece of gear that protects against the injury you most want to avoid, and the habit is far easier to establish at age 3 than to introduce at age 7.
For a low-speed ride-on, the correct type is a standard children’s bicycle or multi-sport helmet that meets the U.S. Consumer Product Safety Commission (CPSC) standard – the same helmet you’d use for a bike, scooter, or balance bike. Look for a CPSC certification sticker inside the helmet. You do not need a heavy full-face motorcycle helmet; those are built for far higher speeds and are uncomfortably heavy for a small child on a slow toy, which makes them more likely to be resisted or worn wrong.
Fit matters as much as the helmet itself. A good fit sits level and low – the front rim about one to two finger-widths above the eyebrows – sits snug without rocking side to side, and buckles with the side straps forming a “V” just under each ear. If your child is between two sizes, size down for a snugger fit and use the helmet’s fit pads or dial adjuster. A helmet that slides around does little in a fall.
Everything else, in order of usefulness
Closed-toe shoes are the second essential. Kids instinctively put a foot down to steady themselves at slow speed, and sneakers prevent scraped toes and stubbed feet. Skip sandals, flip-flops, and bare feet entirely.
Long pants or leggings are an easy win. At ride-on speeds, most minor spills produce a knee or shin scrape, and a layer of fabric prevents the majority of them with zero downside.
Knee and elbow pads earn their place during the learning phase and on hard surfaces like concrete driveways, where the youngest and newest riders take the occasional low-speed tumble. Once a child rides confidently on grass or smooth pavement, many families relax this one – your call based on your child and your surface.
Light gloves are genuinely optional. They add a little comfort and guard against minor palm scrapes, but they’re not doing critical work at these speeds.
What you can confidently skip: full-face motorcycle helmets, armored or “body armor” jackets, and over-the-ankle moto boots. Those belong to the gas-powered mini-bike and dirt-bike world. On a 3 mph electric ride-on, they add weight, heat, and friction to the experience without adding meaningful protection – and gear a child resents wearing is gear that ends up in the garage.
Setting Up a Safe Place to Ride
Gear protects your child if something goes wrong. A well-chosen riding space keeps things from going wrong in the first place, and it’s the half of safety that parents most often overlook.
Good starter surfaces are flat, smooth, and enclosed or clearly bounded: a level driveway, a patio, a backyard with short dry grass, an empty cul-de-sac with adult supervision, or a paved park path during quiet hours. Flat and smooth lets a beginner focus on steering and throttle instead of fighting the surface.
Surfaces and situations to avoid, especially early on:
Any slope or incline – gravity plus a young rider’s limited braking instinct is the most common way a ride-on gets away from a child
Anywhere near water – pools, ponds, drainage ditches, or open water of any kind
Driveways that open directly onto a street, unless there’s a firm, understood boundary and constant supervision
Loose gravel, wet or icy surfaces, and long or soaked grass, which reduce traction and control
Crowded areas with foot traffic, pets, or younger siblings underfoot
Before the first ride, walk the space yourself and clear the obvious hazards: garden hoses, sprinkler heads, low steps, planters, and anything a front wheel could catch. For a sense of which surfaces different ride-ons actually handle well and which they struggle with, our guide onwhere ride-on motorcycles and trains work best breaks down real-world terrain in more detail.
Supervision and Speed: The Two Biggest Safety Levers
The most effective safety tools aren’t gear at all. They’re how you supervise and how you manage speed – and both are largely free.
Use the parental remote as a safety system, not a novelty
If your ride-on model includes a parental remote control, treat it as core safety equipment rather than a gimmick. It lets you cap the top speed to the lowest setting while your child is learning, and it lets you stop the bike instantly if they head toward a hazard before their own reaction time can catch up.
A simple, effective progression works like this:
Start slow. Lock the speed to the lowest setting for the first several sessions.
Split the skills. For toddlers, drive the throttle from the remote while your child just steers – one new skill at a time is far less overwhelming.
Hand over control gradually. As confidence grows, let them manage the throttle while you keep the remote as a backup.
Raise the ceiling in steps. Increase the speed limit over weeks, not all at once.
Before each early session, confirm the remote actually stops the bike from the far edge of your riding area. If the response is laggy at that distance, you’re at the edge of reliable range – shrink the riding zone or move your supervision spot closer. The mechanics of first-ride setup and this teaching progression are covered step by step in ourelectric motorcycle ownership and teaching guide.
Match supervision to age
Ages 2–3: Constant, arm’s-reach supervision. The adult effectively co-pilots via the remote.
Ages 4–6: Active supervision with a clearly defined boundary (“between the fence and the garage”) and the remote nearby.
Ages 7+: Visual supervision within a known-safe, enclosed space, with independence earned through demonstrated control.
Age ranges are a starting point, not a rulebook. A cautious four-year-old may earn independence faster than an impulsive six-year-old. Maturity, focus, and the ability to follow “stop” reliably matter as much as the number.
Simple House Rules That Make Safety Automatic
The families who ride safely without constant friction are usually the ones who turned safety into a routine instead of a negotiation. A few rules, applied consistently, do most of the work:
Helmet on, or the bike doesn’t move. No helmet, no ride – every single time, no exceptions and no debate.
Ride only where we’ve agreed. A defined, understood boundary the child can repeat back to you.
Feet and hands stay on the bike while it’s moving – no dangling feet dragging for the ground.
Stop means stop, right away. Practice the “stop” command as a game before it ever matters in a real moment.
One rider at a time. Ride-on motorcycles are single-rider by design; passengers throw off balance and weight limits.
Charge and park it properly when riding’s done, so the next ride starts safe and ready.
Kids follow rules they’ve helped set and see modeled. If you wear a helmet on your own bike, “helmet on” stops being a fight and becomes just what riding looks like in your house.
A Quick Pre-Ride Safety Checklist
Thirty seconds before each session prevents most avoidable problems:
Helmet on and fitted correctly (level, snug, buckled)
Closed-toe shoes on
Battery adequately charged for the session
Riding area walked and cleared of hazards
Speed set to an appropriate limit for today’s rider and surface
Parental remote on hand and tested (if your model has one)
Boundaries stated and understood
Are Electric Ride-On Motorcycles Safe for Kids? The Honest Answer
Yes – for the age range they’re designed for, when matched to the child and used with basic precautions. The low speeds, soft-start motors, wide and stable stance, and parental remote on quality models are specifically engineered to keep the experience gentle and controllable. Choosing a model with genuine stability and safety features is itself part of riding safely; you can see how those features come together across the current kids’ ride-on motorcycle range, and every model Toysporter carries is ASTM F963 safety certified.
No outdoor activity is risk-free, and this guide isn’t a promise that nothing will ever happen – a scraped knee is part of childhood. But the serious-injury picture people imagine when they hear “kids” and “motorcycle” in the same sentence comes from a completely different category of machine. Match the bike to your child’s age and size, insist on a helmet, pick a sensible space, supervise appropriately, and keep the speed reasonable, and a ride-on motorcycle is one of the more manageable outdoor toys a family can own – and one of the most loved.
9. FAQ Section
Does my child need a helmet to ride an electric ride-on motorcycle? Yes. A properly fitted helmet is the one piece of safety gear you shouldn’t skip, on every ride. For a low-speed ride-on, a standard children’s bicycle or multi-sport helmet that meets the U.S. CPSC standard is the correct type – you don’t need a heavy motorcycle helmet.
What kind of helmet is best – a bike helmet or a motorcycle helmet? A CPSC-certified bike or multi-sport helmet is the right choice for a low-speed electric ride-on. Full-face motorcycle helmets are designed for much higher speeds and are heavy and uncomfortable for a small child on a slow toy, which makes them more likely to be worn incorrectly or refused.
What should my child wear besides a helmet? Closed-toe shoes are essential to protect toes during slow stops. Long pants or leggings are an easy way to prevent most knee and shin scrapes. Knee and elbow pads are worth adding during the learning phase and on hard surfaces. Gloves are optional. Armored jackets and moto boots aren’t needed at these speeds.
Are electric ride-on motorcycles safe for toddlers? For the youngest riders (around ages 2–3), safety depends heavily on a stable design – ideally a wide three-wheel stance – a low speed setting, and constant arm’s-reach supervision with the parental remote controlling speed. Under those conditions, a purpose-built low-speed ride-on is designed to be gentle and controllable for toddlers.
Where is the safest place for my child to ride? Flat, smooth, enclosed or clearly bounded spaces are best: a level driveway, patio, backyard with short dry grass, or a quiet paved path. Avoid any slopes, anywhere near water, streets, loose gravel, wet or icy surfaces, and crowded areas.
How do I stop my child from going too fast? Use the parental remote (if your model has one) to lock the top speed to the lowest setting while your child learns, then raise it gradually over weeks. Setting a low speed ceiling lets a child develop control without the bike responding faster than they can handle.
Can two kids ride one ride-on motorcycle together? No. Ride-on motorcycles are single-rider by design. A second rider affects balance and can exceed the weight limit. Households with two kids who want to ride at the same time are usually better served by a two-seater format – our motorcycle vs. train comparison walks through that decision.
Do ride-on motorcycles need any safety certification? Look for ASTM F963 certification, the U.S. toy safety standard, which covers structural, electrical, and material safety. The currentmotorcycle selection at Toysporter is ASTM F963 certified.